Koi keeping is a lot of fun in many ways. Daily koi appreciation is one of the main joys for Koi hobbyists, and many also enjoy Koi hunting, grow-outs, or entering a Koi show. In addition, there are quite a few hobbyists who enjoy breeding their own baby Koi in the springtime. They get only one chance a year, and they consider “Koi breeding” as an actual “ultimate pleasure.”
Maybe Koi breeding could be something you will be excited about, too. However, you must know what to prepare and a few techniques for mating them and incubating their eggs. Spring is the best time to breed them. Let’s learn the proper way of Koi breeding for the best results.
The conditions
You need healthy Koi—1 female and 2–3 males (they all must be older than 3 years old). After successfully breeding them, you will need to sort them out by your own type; and if you care about the results, try starting with Shiro Utsuri because they are easier to sort.
However, you might say “I want more red color in my pond!” In this case, Kohaku might be the best choice to begin with. I’ll tell you beforehand that the following breeding method is not the only one. There are also other ways, but they require higher levels of expertise.
Things to prepare
- 10–15 spawning ropes
- 26.6” round viewing bowl
- Plastic vessel for breeding brine shrimp
- Titan heater 1000w for heating 6’ round show tank
- Ceramic heater 300w for heating plastic vessel for brine shrimp
- Thermostats for both Titan heater and ceramic heater (1 each)
- Air pump model 30 or 40
- Air hose and air stones
- *Malachite green, thermometer, air tube, air stones, brine shrimp etc.
Spawning
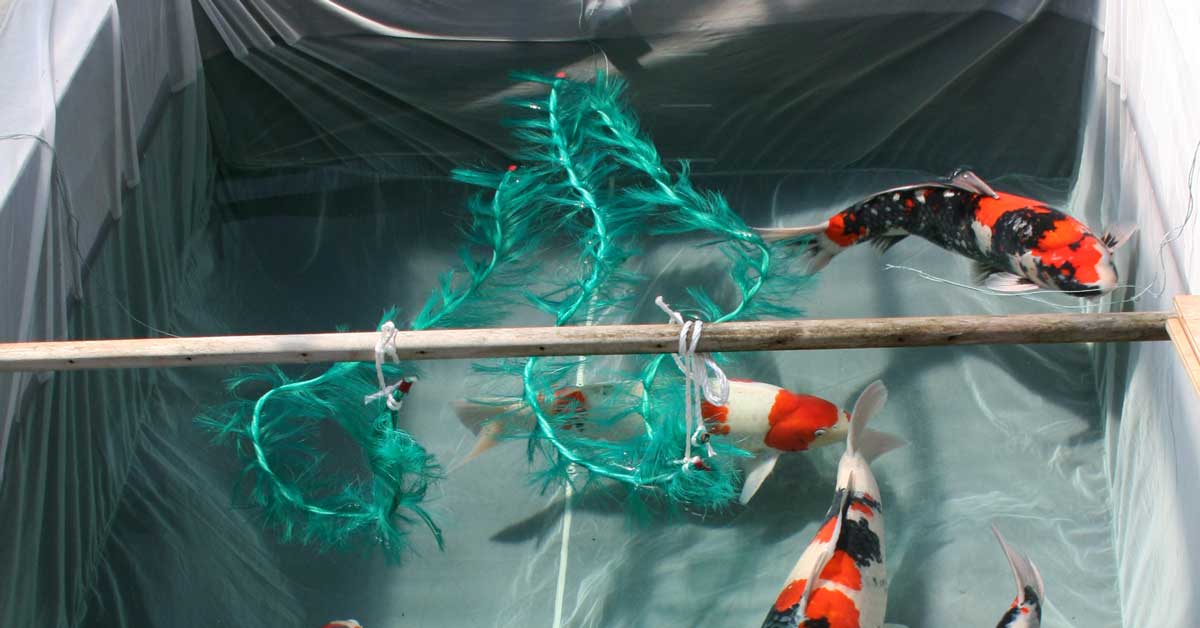
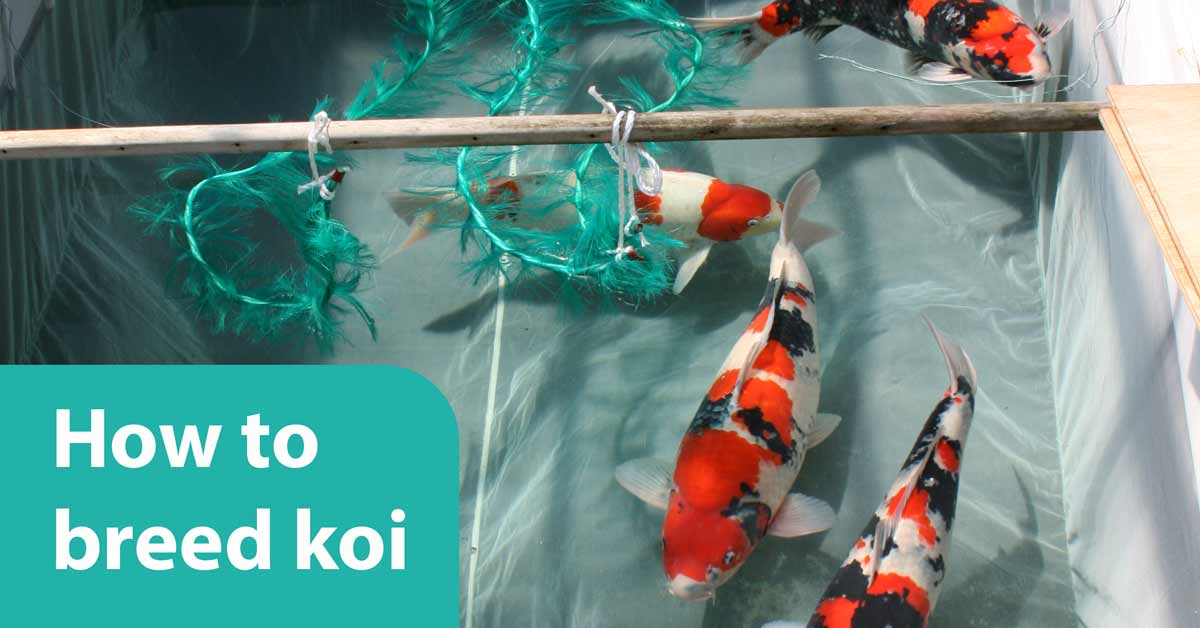
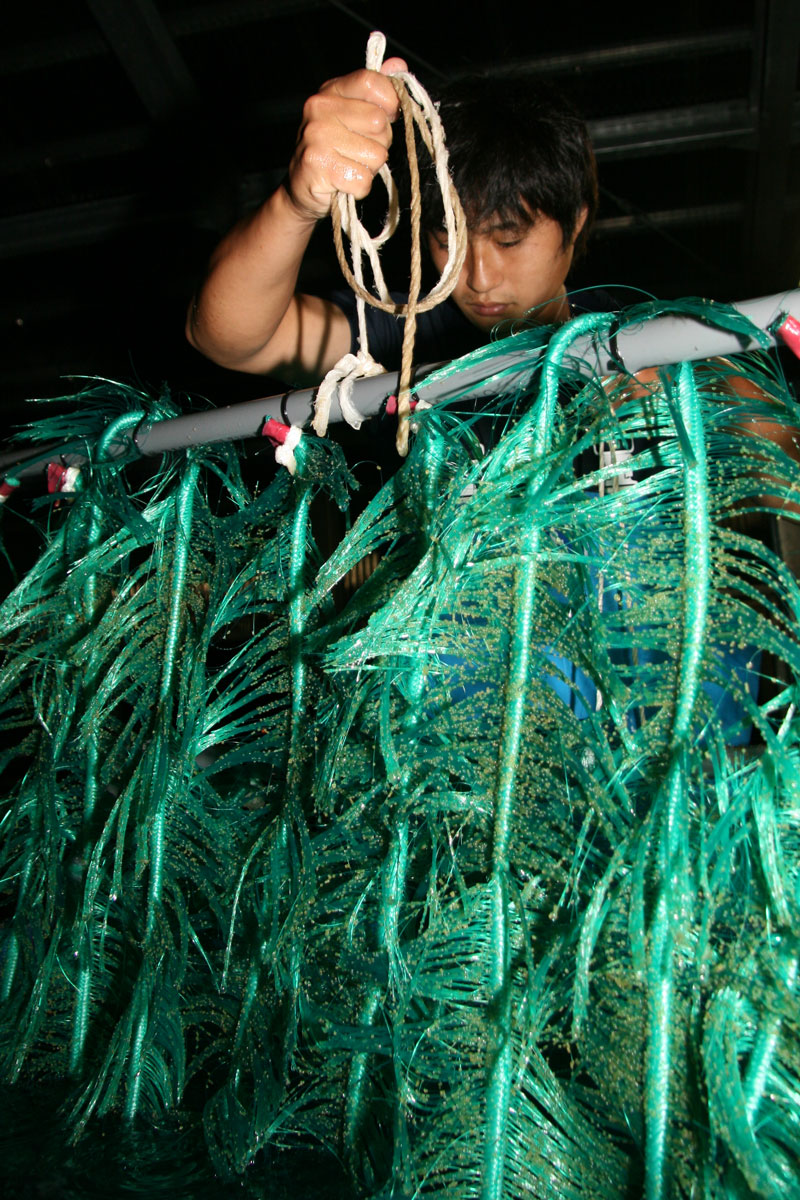
Place spawning ropes
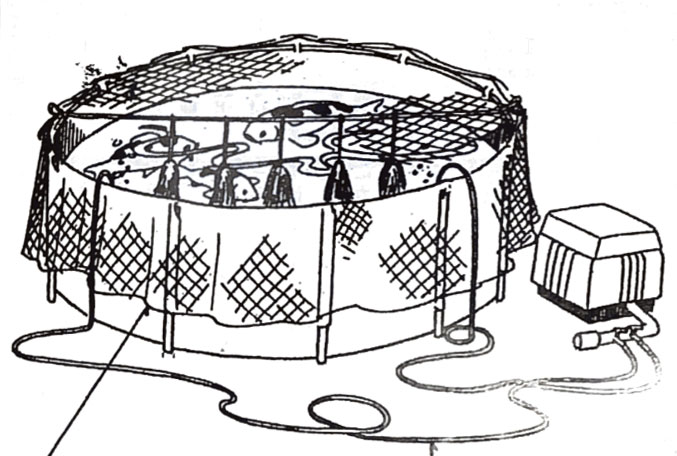
When the water temperature gets around 75°F, fill up the 6’ round show tank with water 2-feet deep and set the spawning rope as pictured above. Introduce your parent Koi into the tank. Don’t forget to set up an aeration and tank cover net. This process should be done on the day before your day off.
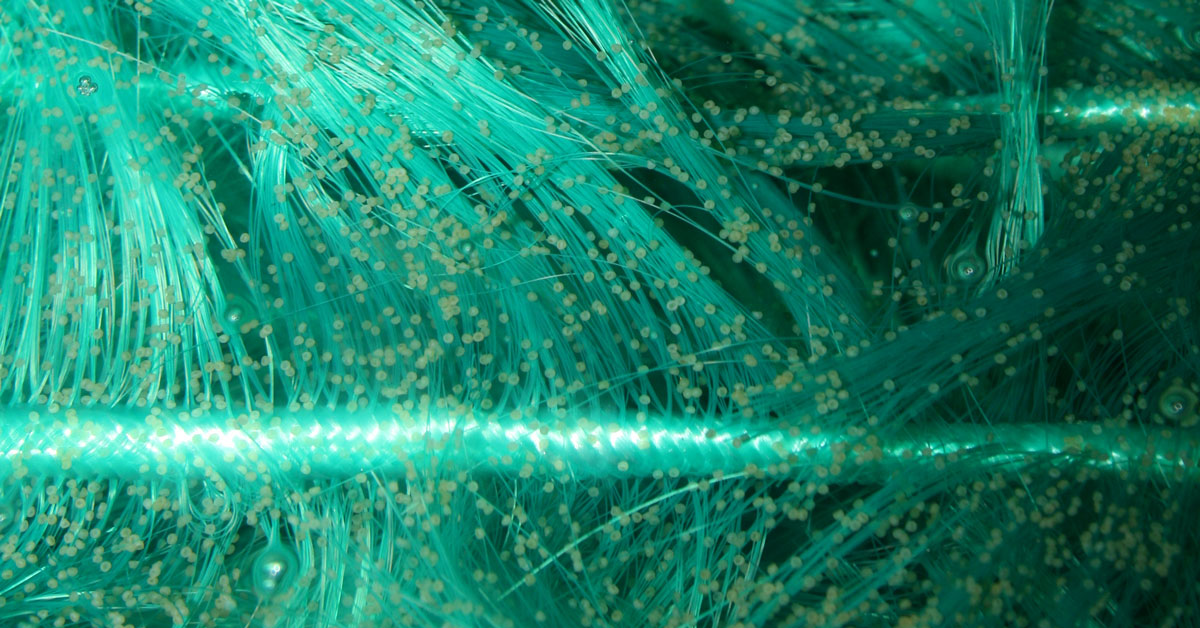
Koi eggs on spawning ropes
Next morning, check whether there are eggs on the spawning rope. If you see millions of eggs on the spawning rope, you already succeeded. Try again if you don’t see eggs. You can either continue waiting for several nights or set up same structure another day and try again. You will eventually see their eggs if you are patient enough.
You may switch a parent Koi with another potential Koi. This sometimes makes it easier for them to fall in love each other.
One thing you must not miss is disinfection. Dissolve 2 grams / 265 gallons of malachite green into the water and soak the spawning rope with eggs for 30 min.
An example of spawning tank set up.
*If your spawning rope is about 5 feet long (or 150cm), fold in the middle, tie the middle part to a top rope, and hang 4–5 spawning ropes from the top rope in the same way.
Cover the tank with cover net.
Don’t forget to keep aeration all the time.
After the disinfection, move the spawning ropes to the tank which is about a same size as the tank you used for spawning. Though you can also use the spawning tank for a next step, you should take out those eggs on the bottom of tank to reduce contamination. As a beginner, you must focus on keeping the environment healthy for the eggs and fry rather than attempt to incubate more eggs.
- Make the water in both the spawning tank and incubating tank the same temperature.
- Again don’t forget the aeration in the tank for incubation.
- Keep the water temperature in the incubation tank at 77°F.
- Keeping the water temperature constant is the key to incubate healthy fry, and they will hatch their eggs in 3 days if you keep the water at 77°F.
- At the beginning, those fry will stay by the spawning rope or tank wall; but once they start swimming around, you can take out the spawning rope from the tank.
- They need food after 24 hours of hatching; so you will start making food for them at the same time that they hatch out of their eggs.
Make sure the top rope is tightly tied.
Food-making instructions
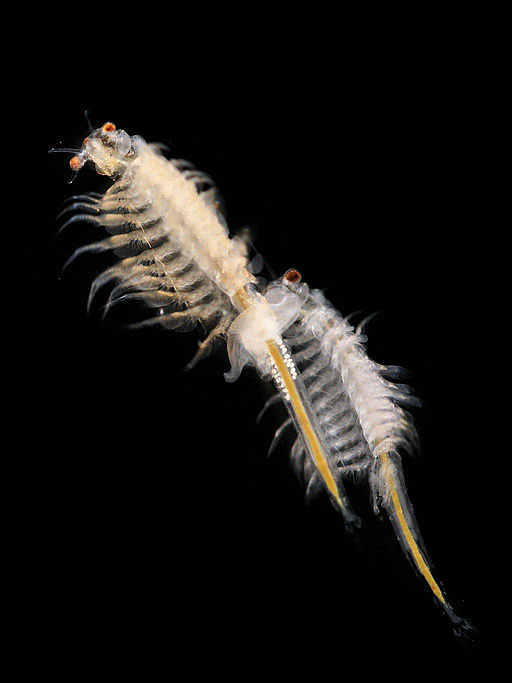
For professionals and experienced Koi hobbyists in Japan, it is common to breed water fleas as fry’s food; but you can also feed them with brine shrimp (Artemia), too.
- Fill up a vessel with 50 L of water and 1g of salt (0.2% salinity)
- Put 50g of brine shrimp dry eggs into the vessel
- Keep water temperature 83–86°F by ceramic heater.
Aeration is needed in this vessel. Then the brine shrimp will hatch their eggs in 24 hours, and you are able to feed them to your fry.
After 24 hours, stop the air pump; and wait until the shell and brine shrimp will be separate. After a while, you will see the hatched brine shrimps on the bottom of vessel. By using a hand-operated water pump, suck up the shrimps and flow into the incubation tank.
After feeding them with brine shrimp for 10 days, your fry grow will big and you can switch to an artificial feed.


Great info, I also have fresh new water spraying in the tank with the eggs and I also use spawning net.
Spawning is the easy part not the work begins. Culling. I created those “sucking” machines to separate the black Frys.
You are invited to come to see me, let me know when you available.